Sunday, September 23, 2012

Chocolate and Butterscotch Chip Oatmeal Banana Cookies

Hello all!


Yes, it has been a million years (only a couple months) since I've posted anything. I apologize. Profusely. I moved from sunny San Diego, CA to beautiful rural Blacksburg, Virginia. I miss San Diego, the ocean, and the knowledge that there are more sunny and warm days in the year than there are cloudy and cold days...but life must go on.

Sunset Cliffs - San Diego, CA (07/2012)

Just after a thunderstorm - Blacksburg, VA (09/2012)


And it has! It took me a bit to get situated here, and now that I'm situated, school has consumed me completely. Please don't be angry with me. Send me a message or comment every so often so I know that I'm in your thoughts and I promise it will motivate me to come and post. I've started a PhD degree in Clinical Psychology and Science at Virginia Tech and it's been a great experience thus far. I have pretty close to zero time to relax, but the pace is refreshing and because I like what I'm learning/doing it hasn't been so bad. Lets hope none of that changes.

For now, here is the cookie recipe I promised so long ago!


Chocolate and Butterscotch Chip Oatmeal Banana Cookies

Ingredients


· 1-3/4 cups all-purpose flour
· 1 cup sugar
· 1 teaspoon salt
· 1/2 teaspoon baking soda
· 1 teaspoon ground cinnamon
· 1/4 teaspoon ground nutmeg
· 1/2 cup oil + 2 tbsp
· 1 egg (or 1 tbsp ground flax mixed with 3 tablespoons water left to sit for 5 min)
· 1 tbsp apple cider vinegar (or white vinegar) (if you use flax in place egg)
· 1 tspn vanilla extract
· 1 cup mashed ripe bananas (about 2)
· 1/3 cup + 2 tbsp peanut butter
· 1 cup rolled oats
· 1 cup semisweet chocolate chips
· 1/3 cup chopped butterscotch chips (leave out to keep vegan)
Directions

·In a bowl, combine the first six ingredients; add oil and mix until mixture resembles coarse crumbs. Add egg (or flax egg), vinegar (if using flax egg), vanilla, bananas, peanut butter and oats; mix well. Stir in   chips.
·Drop by tablespoonfuls onto greased baking sheets. Bake at 375° for 13-15 minutes or until bottom is golden brown and top is slightly browning. Cool on wire racks. Yield: 2 dozen.


I love these cookies with a cold glass of coconut milk. ALSO I found that the brand Almond Breeze has a combined coconut AND almond milk and is AWESOME. I've included the link for the unsweetened version, although sweetened versions exist as well. Hugs all!

Friday, July 27, 2012

Coming Tomorrow!

Just a quick note to let everyone know that I will be posting my Chocolate chip, butterscotch chip, oatmeal, banana cookies tomorrow. Yay!

Hope you love them. Check back tomorrow!

Saturday, July 21, 2012

Vegan Baking...WHY?

Hey all,

So yes, I haven't posted in a LONG time. I know. Don't hate me.

It's been a crazy month and a half. Lots of data collection for my thesis (which I now need to analyze mad-style), a lot of visits from wonderful friends and family, and packing for  our move to Virginia. It's been stressful, wonderful, and definitely a learning experience, but I miss blogging, and I miss cooking/baking new things for you guys. This post isn't so much a recipe, but rather a commentary. The recipe will come a little later when things calm down a bit.

I made oatmeal chocolate chip peanut butter banana cookies. Yes, that is a mouthful...of goodness! I was invited to a housewarming party this evening and earlier today I found myself with overripe bananas and not much time. Initially I thought banana bread, but the recipe I love takes over an hour to bake. My next thought was banana oatmeal cookies. I found a recipe that looked good and might be easy to adapt (aka add some peanut butter, etc). And then I realized...crap. I have no eggs, no butter, and not as much oatmeal as I needed.

Improv is a huge part of baking at the spur of the moment. I have a few friends that are Vegan, or gluten free, or have allergies, etc and their diet restrictions have taught me to adapt my cooking/baking and gain the knowledge necessary to do so. One might initially think ew, how the heck can a cookie without eggs, or butter taste good at all? Well it can, with a few easy adaptations. The internet is a GREAT source for picking up this knowledge. So in place of the butter, I used 3/4 of the quantity of butter, in oil and added it in the same order as I would normally add butter. In place of 1 egg, I mixed one tablespoon of ground flax seeds (a great source of plant-based omega-3), and three tablespoons of water and left it for a few minutes until it became gelatinous. Eggs are typically used as a binding agent to help keep things together and they're important in baking cakes and cookies because they lead to softer texture rather than the chewy texture of bread for example.

I also added a teaspoon of apple cider vinegar (white vinegar would work as well) because without the addition of a real egg, I didn't want my cookies to lack moistness and leavening. In Vegan baking many times, you'll see the addition of a teaspoon to a tablespoon of apple cider vinegar, and moistness is one of the main reasons (also added to non-dairy milk as a replacement for buttermilk). Think back to the volcano experiment a lot of us did in elementary school. Vinegar, mixed with baking soda equals explosive bubbling. Baking and cooking are both VERY related to chemistry in the way that what you end up with is a product of a bunch of reactions with the addition of good flavors. Embrace the science and use it to adapt! The recipe already called for baking soda, so the addition of vinegar reacts with the baking soda to create the bit of rise that the cookies needed as well.

So there you have it. This improvisation in baking/cooking is what makes learning and understanding vegan baking (and any other specialty type of baking) necessary. Plus you can accommodate friends/family with lactose intolerance, allergies, food restrictions, etc, and that just makes you that much cooler. 

All in all, the cookies turned out amazing. The batch I made is GONE, which is why I don't have pictures/recipe for today (which also means they were good?). But I promise they will be up soon. Promise promise.

Sunday, June 10, 2012

White Peach, Blueberry, Blackberry Pie

Hey all,

Definitely long time no blogging. My thesis is slowly consuming me and I'm sitting here wondering whether I'll have the time to finish everything before I move to Virginia to start my PhD program. I'll finish though, because I have to (and want to, and kinda really need to...haha). So this post is actually the first of a two part post. It's the beginning of something crazy--like chocolate croissants... those are pretty crazy...good. *Disclaimer* No I don't just sit here stuffing my face with pastries, and you shouldn't either. Definitely not good for you. Although if something ever came out that made eating pastries all day a no problem kind of thing, I may in fact move in that direction. Hah.


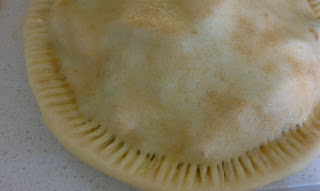
So the first part of this *insane* endeavor is a pie. Any pie really. I made a white peach, blueberry, blackberry pie and you should too. Mind you this pie would be awesome serving it's purpose as just a pie, but it CAN be something greater. You'll just have to wait and see. I got the recipe for the pie crust and the initial pie idea from Joy the Baker. Joy is a fabulous baker (and seemingly wonderful cook), and her writing style is AMAZING. Her posts are super fun to read. I followed the crust recipe exactly, but changed up the filling a little bit. Making a pie crust may seem like a daunting task, but it's seriously the simplest bready-like thing I've ever made. You could also just get a store bought pie crust but I'm telling you, this crust is something else.

White Peach, Blueberry, Blackberry Pie


Crust Ingredients:
  • 2 1/2 cups all purpose flour
  • 2 Tbsp sugar
  • 3/4 tsp salt
  • 1 cup (2 sticks) unsalted butter COLD and cut into cubes
  • 5 Tbsp + 2 tsp ice cold water
  • 1 tsp apple cider vinegar (white vinegar should work as well) 
Crust Directions: 
  • Sift together flour, sugar and salt
  • Add cold butter to the dry mixture and incorporate butter into flour with your hands. You should end up with peas and oatmeal sized bits when you're done. (See Joy's page for a picture of this). Do this as quickly as possible. 
  • Mix water and vinegar in a cup 
  • Make a well in the center of the flour/butter mixture and pour the water and vinegar into the well. 
  • Bring dough together with a fork. When slightly combined and kind of moistened, turn dough onto lightly floured surface and knead LIGHTLY with your hands until all combined. 
  • Separate dough into two pieces and form two disks. 
  • Wrap each disk in plastic wrap and refrigerate for an hour
While your crust is chillin' in the fridge (literally), get started on the filling!


Pie Filling Ingredients:
  • 4 medium white peaches (I'm guessing you can substitute any type of peach here) 
  • 3/4 cup (6 oz) fresh blueberries
  • 3/4 cup (6 oz) fresh blackberries
  • 2 tsp fresh lemon juice
  • 1 tsp ground cinnamon 
  • 1/2 cup granulated sugar
  • 1/4 tsp ground nutmeg
  • 1/8 tsp ground ginger
  • 1/8 tsp ground coriander (you COULD eliminate this if you wanted)
  • 3 Tbsp all purpose flour
  • 1 Tbsp corn starch
  • 1 egg beaten to be used as egg wash for the top of the pie
  • 2 Tbsp sugar + 1/2 tsp cinnamon for the top of the pie (you will use less than this more than likely)

Pie Filling Directions: 
  • Pit and slice peaches (leave skin on)
  • In a large bowl, throw in peaches, blueberries and blackberries
  • Add lemon juice to fruit
  • In a separate smaller bowl, whisk together the sugar, spices, flour, and corn starch
  • Add spice mixture to the fruit and mix to combine. Make sure fruit is covered pretty evenly.
  • Set aside 

Putting the Pie Together:
  • Set your oven to 400 F
  • Take one disk of dough and place it on a lightly floured surface.
  • Flour your rolling pin and roll out the dough into a circle about 13-14 inches round. ( this will take some effort; rolling, folding edges, turning dough clock-wise or counter-clockwise with every few rolls). Don't OVERWORK the dough. The butter will warm and you don't want that. Also, remember, the circle will not be perfect--baking is not perfect haha. 
  • After you're done rolling the dough out, spray a 9 inch pie dish with nonstick spray and place the dough circle on the bottom.
  • Add the filling into the dough.
  • Repeat the dough rolling process with the second disk and place the second dough circle on top of the filling
  • Pinch edges together with your fingers or a fork (I used a fork) 
  • Cut any dough that is hanging off the edge of the pie pan and set this dough aside.*
  • Brush beaten egg on top of the pie, making sure to cover all of the surface.
  • Sprinkle Cinnamon sugar mixture on top.
  • Cut a few slits LIGHTLY going around the center of the pie. 
  • Place pie pan onto a cookie sheet, also place another cookie sheet under the rack you will be putting your pie on in the oven. (This is to prevent the filling from bubbling over, burning in your oven, and suffocating you--not to mention that ANNOYING SMOKE DETECTOR).
  • Place pie in oven and bake at 400 F for 15 minutes. Then turn down the heat to 375 F and bake for another 40-50 minutes. If you find the top getting too dark towards the end, just move the pie down the the bottom rack.The pie is done when the top is golden brown and the filling is bubbling :).
  • Cool for 2 hours at room temperature before serving. Store, covered, in the fridge. Should last up to a week. 

* Roll out the excess dough that you cut off, and if you have a cookie cutter, or are pretty confident in your knife skills, cut the dough into shapes. Brush with egg wash and sprinkle cinnamon sugar on top, bake for like 15-20 minutues or until golden brown. You can eat these just by themselves (they're awesome), or you can set them aside and use the for part two. 


The white peaches add a really nice flowery sweetness to the pie--love em! Share with friends! Don't be greedy. :) Thanks all for reading! 

Friday, May 25, 2012

Mirza Ghassemi (Persian Eggplant Tomato "Dip")


Hey guys,

Long time no recipe-ing. Been a bit busy with my thesis proposal and data collection as of late. Please keep me in your thoughts as I go through what is going to be a CRAZY summer. More updates on that as they develop. In the meantime, I have still been cooking to release the stress build up. So as promised, you'll see an Iranian dish on here every so often. The dish I have in mind for today is native to the northern part of Iran and a staple in the Gilaki cuisine. As some of my readers know, my husband's family is originally from Rasht, a province in northern Iran. Gilaki cuisine is very different from what many people consider "Persian food". It consists of very little red meat, other than the occasional vavishka (originally a Russian dish made with ground beef, onions, and tomatoes), or kabob torsh (sour pomegranate kabob). Instead they use a lot of fish and eggs as sources of protein. Also, the use of garlic in Rashti or Gilaki cooking is NOT for the faint of heart. They use garlic like it's nobody's business. (As you will see here shortly).

Mirza Ghassemi (Persian Eggplant Tomato Dip)


Ingredients
  • 1 medium bulb of garlic (not clove, but the ENTIRE bulb) 
  • 4 medium eggplants 
  • 6-7 large tomatoes
  • 7 eggs
  • 1 1/2 tsp turmeric
  • Salt and pepper to taste (make sure you're not under-seasoning)
  • 3-4 Tbs olive oil
Directions
  • Preheat oven to 400 F. Stab each eggplant all over with a fork. Place eggplants (uncut and unpeeled) onto a foil covered baking sheet and bake until soft. Mine took about an hour to really get soft, but check periodically after about 30 minutes. To get really authentic with this you can grill the eggplant until soft. 
  • While eggplant is baking, peel tomatoes by boiling in water for 3-4 minutes (until skin splits) and then placing tomatoes immediately into ice water. You should easily be able to peel of the skin with your fingers. Dice peeled tomatoes and put them into saucepan. 
  • Add a little bit of salt to the tomatoes and cook them down on medium/high heat until about most of the liquid boils off (1/3 should still remain), then lower heat and cover.
  • When eggplant is cooked, remove from oven and peel them and cut off the end. Chop eggplant finely (almost smashing it as you dice, it want it to almost be pasty).
  • At this point peel, finely dice, and smash the garlic. 
  • Heat 2-3 tablespoons of oil in a deep pan and add two-thirds of the prepared garlic to the pan. When lightly browned, add 1 1/2 tsp turmeric to the garlic and stir for a minute or two.
  • Add eggplant and saute for 6-7 minutes. If there's any liquid coming from the eggplants at this point, let most of it simmer off. 
  • Add cooked off tomatoes to the mixture and combine thoroughly.
  • Turn heat to medium-low and allow any remaining liquid to simmer off.
  • While the eggplant mixture is cooking, heat a Tbs of oil in a pan.
  • crack eggs into a bowl and whisk, add some salt and pepper to the eggs (to taste)
  • Add remaining garlic to the pan, saute until lightly browned and add a 1/2 tsp of turmeric--stir for a couple minutes
  • Add whisked eggs to the pan and stir until you essentially have what looks like scrambled eggs (you want the pieces to be relatively smaller and not in huge chunks.) 
  • Add cooked eggs to the eggplant mixture and combine for a uniform look.
  • Taste and add salt and pepper accordingly
  • Cook for 15-20 minutes longer so that flavors combine and then serve and enjoy!
Poke! :D 
It should resemble this :) 

Enjoy!

Now in Rasht, Mirza Ghassemi is usually served as an entree with white basmati/Persian rice, ashpal (white fish eggs), baghali (fresh fava beans), walnuts, and sliced Persian cucumber. We kept it simple with white rice, and salad shirazi (salad made with diced cucumbers, diced onions, diced tomatoes, lime juice, dried mint, and salt and pepper). Oh yeah... and my husband had this with pickled garlic as well. Luckily we had no where important to be the next day. A simpler way to eat it, and the way in which restaurants usually serve it in Tehran or the US is just with warm bread. This makes a perfect appetizer or entree. I imagine it would be a great spread on crackers or toasted french bread as well. 

Sunday, May 13, 2012

Whole Grain Crackers


First order of business...HAPPY MOTHER'S DAY to all the mothers out there. Coincidentally this year mother's day in Iran was also pretty close to the US mother's day (It was on Friday), but regardless, no matter where in the world they are, mothers are beautiful, perfect, and oh so kind in their own way. A special shout out to my own mommy who I just skyped with! :)

This post may seem like..."omg I can't believe she's posting about crackers", but crackers are big deal. I mean this all actually started when I was eating tea biscuits (these Ulker tea biscuits) with...tea--and I thought to myself, "I wish I could make these". To my surprise, it's totally possible to make crackers. The ones I'm sharing with you guys today unfortunately didn't turn out exactly like the tea biscuits, but they're still absolutely delightful. They kind of taste like a biscuit version of  Nabisco's Wheat Thins--not too sweet, not really salty, good on their own... and a perfect pairing with whatever you want to top it with (peanut butter and jelly, butter and jam, chocolate...). They're also pretty easy to make, with the hardest part being the arm workout from rolling out the dough pretty thin.

I made a couple changes to the original recipe because some people had put in their reviews that the granulated sugar made the crackers a bit grainy and that the amount of sugar really made the crackers sweet.

Whole Grain Crackers
Adapted from www.egglesscooking.com (click for direct link to original recipe)

Ingredients:

  • 1 and 1/3 cup whole wheat flour
  • 1/4 cup all purpose flour
  • 1 tsp baking powder
  • 1/2 tsp salt
  • 2 tbsp rolled oats
  • 5 tbsp cold butter (I'm not sure if you can substitute margarine or extra virgin coconut oil for this, but I will try it and let you guys know) 
  • 1/3 cup powdered sugar  (or other powdered grain sweetener)
  • 1 tsp vanilla extract
  • 1/3 cup + 2 tbsp milk (whatever kind you prefer, 1%, 2%, whole, almond...)
  • A couple tbsp of granulated sugar for topping (you will likely use less than this) 
Directions:
  • In a large mixing bowl, sift flours, baking powder, and salt (sifting is important to ensure that your dough is uniformly mixed and that no lumps get into the batter, I usually whisk these ingredients in the sieve to help mix them up and push them through a bit quicker)
  • Cut up cold butter into small pieces and add to the flour mixture. Mix with a hand mixer or tabletop mixer, or work with your fingers until mixture forms coarse crumbs
  • Stir in sugar and slowly add milk to form a dough
  • Knead dough with hands until smooth 
  • Form dough into a disk, wrap it and place in the refrigerator for 30 minutes. In the meantime, pre-heat oven to 375 F. 
  • Line two cookie sheets with aluminum foil and spray them lightly with oil
  • After 30 minutes in the fridge, lightly flour the surface you're working on and roll out dough into 1/2 cm thickness. I had to do this in pieces--I didn't roll out the entire dough, but instead divided the dough into 6 pieces and rolled each piece individually. It was a little bit more work but it made things a bit easier as the dough is not like a soft stretchy pizza dough.
  • Use a cookie cutter to cut out whatever shape you like from the dough (I used the opening of the smallest size Rubbermaid food container)
  • Combine dough scraps again with rest of the dough and re-roll and repeat cutting process
  • Prick crackers with a fork a few times before placing them on the cookie sheet
  • Top each cracker with a small pinch of granulated sugar before you place in the oven
  • Baking time depends on the thickness of your crackers and the color of your cookie sheet, mine took about 10-12 minutes. I would definitely watch them after about 8 minutes or so. You're looking for a light golden brown color--nothing dark (which happened to a couple of my thinner ones sadly).
  • Leave them to cool for a few minutes on the baking sheet when done, and then transfer to cooling rack.

I had these crackers topped with banana slices and all natural almond butter. Almond butter (essentially almonds grounded into a paste) is a great nut butter full of Vitamin E, Potassium, Magnesium, Iron, Calcium, and Phosphorus. It's also a great alternative for people with peanut allergies. The key is to find an almond butter made using cold pressed methods (which ensures that nutrients are all still there), and one that is natural (no sugar, extra oil, etc added). 4-5 of these crackers are a great midday snack and the fiber helps keep you full :). 

Leave me some love in the comments below! 

Enjoy!  

Tuesday, May 8, 2012

Update and Sneak Peek!

Hey all!

Thank you so much to those who have continually checked back here! Things are getting a little hectic on the school side of my life, but I promise 2 new recipes this week. Something sweet and something savory! I will be creating a facebook page for this blog soon so that you can follow what happens far easier. Please let me know if there is anything you guys wish to see on here! In the meantime, here's a sneak peak at one of the recipes I'm working on perfecting for the blog: Earl Grey Poppy Seed Muffins (with fig jam and almond butter)!

I wish you all a stress free, relaxing-with-a-cup-of-tea, work/school week! 

Tuesday, May 1, 2012

Spice Mix Hamburgers


An interesting topic of discussion came up today at work (and is completely NOT work related, haha). For lunch, I had brought in some left over pan grilled chicken and roasted baby red potatoes. After heating my food, I walk into the office and apologize to my co-worker in case my food stinks up the room. I mean after all, it was a spice rubbed chicken breast and an equally seasons roasted potatoes. She said it was no problem, and flatteringly mentioned that is looked and smelled really good. Which reminded me--remember back in elementary school and junior high? You would never want to be caught dead being the kid that brought leftovers for lunch. In my case, left over Persian food is not pretty, nor does it smell like what the standard American child is used to. Shoot, even our spaghetti with meat sauce didn't look and smell the same! I have definitely lived through a couple instances of unforgiving children asking "What is thatttttt???" in that grossed out tone (similar to the "OMG you have coooooties" tone). While I don't remember what I usually took for lunch back then (my memory fails me, haha), I do remember that the sandwiches and pizza were probably the only cool thing a person could bring (and this was confirmed by my office mate).

Fast forward to the more recent years. I crave foods with spices, and try and add an exotic twist to even the most American of foods (i.e these hamburgers). I've learned to embrace the difference and variety and in all honesty, people are becoming more and more accustomed and familiar with the more exotic flavors thanks to the internet and the wonders of food blogs. Hopefully by the time I have kids, they will be more open to trying new things instead of hating on the unfamiliar.


These hamburgers have the basic ingredients of a hamburger, but I've added a mix of spices that bring flavors of the Mediterranean and Middle East. In fact these spices are now widely used in many different world cuisines. For this recipe I used extra lean beef to cut down a bit on the fat content, ground turkey is a good alternative too. But for those of you who would like to indulge an 80/20 lean-to-fat (80% lean beef, 20% fat) is plenty.

Spice Mix Hamburgers
Serves 5-6 depending on size of hamburgers.

Ingredients

  • 1 lb extra lean ground beef
  • 1 medium onion grated finely
  • 1/2 tsp chili powder
  • 1 tsp smoked or sweet paprika
  • 1 Tbs ground meat seasoning (I bought this from my local Middle Eastern food market, but you can use whatever go to ground beef spice you have, or purchase this online--Sadaf has some great food items!)
  • 1/4-1/2 tsp ground cumin
  • 2 tsp garlic powder
  • Salt and pepper to taste
Directions:
  • Combine beef with spices, mix thoroughly (get in there with your hands... fear not...just make sure to wash them after touching anything else--you don't want to contaminate anything else) 
  • Heat electric skillet or pan--spray lightly with oil (I heated a skillet to 375)
  • Shape beef into patties (Size up to you) 
  • Cook patties on skillet for about 3-4 minutes each side or until juices run clear (I like my burgers well done, adjust time accordingly for anything medium) 
  • 2 minutes after flipping the burger, top with cheese of choice and allow cheese to melt while the other side finishes cooking. 
  • Spray buns lightly with oil and place on skillet while burgers are cooking.
  • I also sauteed some onions to top the burgers with (cut 1/2 onion into rings, spray pan lightly with oil, sautee until browned and starting to caramelize, add a 1/4 tsp Worcestershire sauce, cook a minute longer and set aside) 

We topped our burgers with tomatoes, middle eastern pickles in brine (found at local middle eastern food market or here), a bit of the saffron aioli I had made earlier that day, pepper jack cheese, caramelized onions and romaine lettuce. This was definitely an indulgence meal. I had one burger, the hubs had 2 (so they were good I guess?). If you try them out, let me know what you think! 


Also, in the comments below, answer this--what are your lunch time memories/nightmares as a child?  

Saturday, April 28, 2012

Saffron Aioli


I always thought condiments were the unhealthiest things ever--and they can be, if you buy store bought condiments with a list of god knows what kind of ingredients they put in that thing. But over the years, I've really come to terms with the idea of balance. Balance in my life, in my relationships, and yes, even in my condiments. I also came to learn that the list of 12 ingredients that are listed on the back of mayo--well that's um...8 more ingredients than what is necessary for a homemade mayo.

I recently, in the past year, lost about 35+ lbs with diet and exercise, and the best part of this diet was that I never felt like I was dieting. I ate what I wanted (within reason), but controlled portions, and changed my cooking methods to include less of the things that really aren't necessary to make food taste good. There is eating for pleasure, and for hunger, and then there is EATING. The third kind...unnecessary.

Tonight I'm actually making burgers (recipe for that soon), but to make these a bit fancier, I thought an aioli would be fun. Typically, aioli's are best with fish and chicken--milder meats--but a tiny bit of aioli can give big flavor to anything really. An aioli, by definition, is mayo that has garlic. Some places will omit the garlic and add other things and pretend it's an aioli--but it's NOT an aioli if it doesn't have garlic. Without garlic, it's just a mayo with something added to it.

Saffron, in my opinion is one of the most beautiful spices. It's used fairly regularly in Persian cooking and baking. There's a wonderful aroma and amazing color to saffron--and while it's expensive, a tiny bit goes a long way. Historically, this spice originated in the Middle East, but is now used widely in cuisines worldwide. Saffron happens to also have a history as a remedy for many ailments (asthma, kidney problems, infertility), but research hasn't been done yet to prove that it is in fact effective for these problems. Recent research thought has actually found that saffron has properties that help in lowering cholesterol. (Clearly not in mayonnaise form though...)


Saffron Aioli
20+ servings depending on how much of it you use each time.

Ingredients: 

  • 2 egg yolks
  • 1/2-1 tsp salt 
  • Freshly cracked pepper to taste
  • 1 clove garlic finely minced or grated
  • 2 tsp lemon juice
  • 3/4 cup extra virgin olive oil
  • 1/8 tsp saffron ground with a mortar
  • 2 Tbs hot water
Directions:

  • Place saffron and 2 Tbs boiled water in a small bowl, and set aside to steep for 8-10 minutes
  • The next part can be done via blender, hand mixer, or whisk (if you trust your hardcore whisking skills), I did this with a hand mixer.
  • Add egg yolks, salt (start out with 1/2 tsp and add more at the end if necessary), pepper, garlic, lemon juice, and saffron/water mixture to a medium bowl.
  • Using you method of choice, beat well until combined and a bit thickened.
  • SLOWLY (especially in the beginning) drizzle olive oil while blender, mixer, or whisk is on and working at a medium-high speed. Stop adding oil after about each 1/4 cup just to make sure oil has been well absorbed and emulsified--you don't want to see breakage. 
  • Continue adding the rest of the oil in the same way while mixing constantly. The last minute or two, turn the speed on high and make sure everything is mixed well and has reached mayo consistency. 
  • Refrigerate prior to use for a couple hours, and store in an airtight container for up to one week. 


This was my first time making aioli/mayo.. .and I was pleasantly surprised at how easy it was. I hope you guys enjoy this--and remember, balance is everything. It's okay to indulge a bit every so often, but watch portions, and if you can, make things at home so that you know what's going in it. I'll probably use 1/2-1 tsp for the entire burger--the flavor is this is PACKED. If you split this into about 20 servings, it's only about 77 calories per serving. As always, comments, suggestions, and thoughts are ALL welcome.

Dark Chocolate Whole Wheat Oatmeal Raisin Cookies

Today has been a day of pure success...well, almost. So as I've mentioned in my "About Me" section, I'm currently a graduate student in psychology--I specifically do research using neuroimaging in individuals with Autism Spectrum Disorders. Being a student or working in any field that includes any form of research is a bit...challenging. Not challenging because it's hard, but challenging because research has the tendency to be SUPER exciting, and VERY draining at the same time. Example: For the past couple weeks, I've been trying to get this button box to work (basically used to record responses to a task). First the problem was my version of Windows (no 64-bit)...but I proved them wrong... got it working on there just fine. THEN the issue was the task presentation software. Basically, long story short, thanks to a tech working at the button box company and his help today--all is good in research hood. Yes I just said that. So I went from being purely disappointed in all things research one day, to being super happy and excited today just because when I press the darn button... IT WORKS!!! 

I digress. 

The real reason I'm writing today, is to share my most recent little baking feat. You see, in baking, I not only have to impress my pallet, but I also have to figure out how to tweak things so that they're healthy (yay for me!) but at the same time taste not so healthy (yay for husband!). It's a challenge. So when I use whole wheat flour, I usually try and make the product moist enough, flavorful enough, but without all the added oil and bad sugars. 

Again, long story short, I ran out of all purpose flour to mix with my whole wheat flour to create a cookie that was less wheat-y tasting and more cookie tasting so my husband would eat them. Meh. 

Yay for google. I adapted this recipe from Todd Porter and Diane Cu on the Cooking Channel Blog. Changed some things around, added some dark chocolate, and created something of a cakey cookie that I love (and that my husband couldn't tell was healthier than the average cookie recipe). He did suggest that next time I try and make it more cookie texture and less cake texture, which is a valid point--but I really do like these and hope you guys will too. (There will definitely be more pictures for my future recipes). The recipe calls for unsweetened applesauce (in place of most of the oil), which I made myself and is SUPER easy. I'll include directions for that below too. 


Dark Chocolate Whole Wheat Oatmeal Raisin Cookies
(Makes 22-24 cookies) 

  • 1 cup Thompson Raisins (I had these on hand, but any type of raisin will work)
  • Water (enough to cover raisins)
  • 1 cup whole wheat flour
  • 1 tsp baking powder
  • 1/2 tsp baking soda
  • 1/2 tsp cinnamon (I like cinnamon and added a 1/4 tsp more) 
  • 1 tsp salt
  • 2 Tbs unsalted butter 
  • 1/4 cup agave syrup (low glycemic)
  • 1/4 cup Stevia (not granulated, just out of the packets) 
  • 1/3 cup brown sugar packed
  • 1 large egg
  • 1/2 cup unsweetened applesauce
  • 1 tsp vanilla extract
  • 1 1/2 cups old-fashioned rolled oats (I assume quick oats would work too--but the fiber in the rolled oats is more and therefore better for you)
  • 1/2 bar of your favorite dark chocolate chopped (I used  3 squares of Kras Anno Domini 60% Dark Chocolate (chopped into chip size pieces) which I got our local grocery store (they sell imported European chocolates)--an easy to find replacement would be Ghirardelli's 60% Intense Dark Chocolate. I also added 1/3 cup Ghirardelli's double chocolate bittersweet chips. Essentially, this is what I had on hand.) 
Homemade Applesauce Directions:
  • Peel and core one medium apple--I used Fuji because it was what I had on had and because it has a nice natural sweetness to it.
  • Chop apple into small pieces and place in sauce pan with a few tablespoons of water. Turn heat to medium and cover pan. When water begins to simmer, turn down to medium low.
  • Allow apples to soften (about 15 minutes--I allowed them to cook down a bit while I prepared the other ingredients for the cookies).
  • Mash with back of wooden spoon once soft. If they're not of mashable-with-spoon consistency, run them quickly through a blender or use a soup puree to puree the apples. Allow to cool sliightly and it's ready to use!! Super easy.
Baking Directions:
  • Preheat oven to 375 degrees F (190 C). Line baking sheets with parchment paper or aluminum foil and spray lightly with oil.
  • In a small bowl, place your raisins and cover with warm water--set aside to macerate.
  • In a medium bowl, whisk together whole wheat flour, baking powder, baking soda, salt, and cinnamon. In a large bowl, using a hand or table top mixer, cream together butter and all sugars (agave, truvia, and brown). 
  • Add egg, applesauce, and vanilla extract to butter and sugar mixture and stir with wooden spoon to combine. 
  • Stir flour mixture into wet ingredients. Fold in drained raisins, oats, and chocolate. 
  • Drop rounded tablespoons of batter on lined and sprayed baking sheet, each a couple inches apart from the net. Flatten tops of cookies slightly. 
  • Bake for 10-12 minutes or until they are browned around the edges and still a tiny bit wet in the center.
  • Remove from oven; allow to cool 5-10 minutes on baking sheet, and the move to cooling rack.
  • Enjoy with a glass of milk! (I love almond milk with this--more on that soon.)
Again, these cookies are soft, very moist, and for 24 cookies, that's about 108 calories per cookie! 
Let me know if you guys want me to post more detailed nutritional info for the recipes I put up--it's something I always calculate for myself, so it'll be easy peas-y to just post that here too. Also, if you have any dietary restrictions (diabetic, vegan, etc etc...) feel free to ask me how to best adapt this recipe! 

Thanks for reading and please let me know your thoughts! 

Wednesday, April 25, 2012

An Introduction

Hello all!

So first a quick welcome! If you're reading this blog, you're bored out of your mind, or tortured by pictures of food you've seen me post on Facebook (or both...or neither?). Regardless, just know that either way, I really appreciate you visiting my page!

This blog is going to be mainly dedicated to food--of all types. And I say all types, for a reason. I am born to immigrant parents, from Iran, and have found myself to be an odd concoction  of traditional Iranian, free spirited American, and everything in between. For this... I couldn't be happier. There is a lot one learns from holding multiple perspectives and looking through different lenses and food, beauty, love, and ideas are no different. What you will likely see here will be a mix of all of those things--mainly food, because it holds a special place in my heart. Food to me, is the one thing that can bring friends, families, and even foes together. It is above all things a necessity that is shared between all living things--often evolving to a source of pleasure and ultimately a talent that can be shared and taught. My recipes are mainly adaptations from other recipes that I see, or things I find interesting and want to try. I try my best to keep them healthy, organic (when I can), and pretty easy. Let me know if there's anything you want me to try out, or any suggestions you may have. Also, excuse my lack of photographic skills--it will improve I promise.

Aside from food, I'm a bit obsessed with makeup and often find myself rambling about things completely unrelated to any specific topic altogether so excuse me if you see a random post here and there.

And without further adieu, next post...Dark Chocolate Oatmeal Raisin Cookies